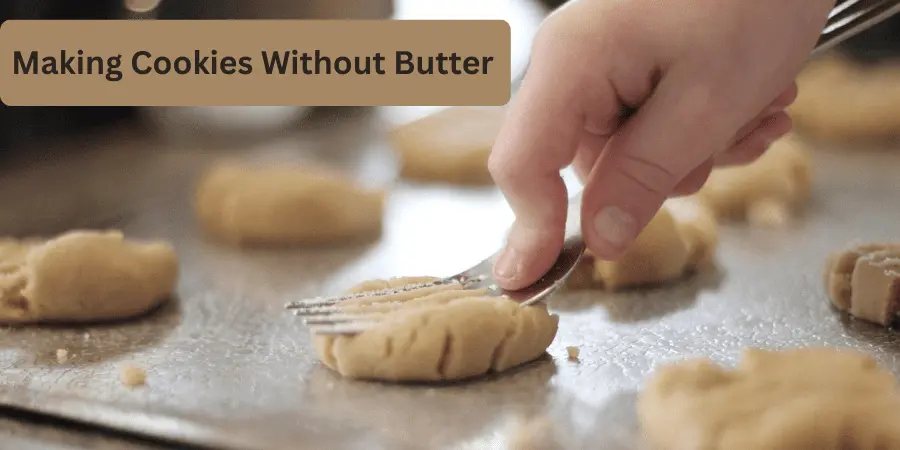
Making chocolate chip cookies without butter is a game-changer for thick, chewy, and soft cookies. No hand mixer or chilling time is needed. In just 20 minutes, you’ll have warm, gooey cookies fresh from the oven—perfect for when you need something sweet, quick, and satisfying. These cookies are always ready in under an hour.
If you’ve run out of butter or need a dairy-free option, this butterless cookie recipe using oil (vegetable, canola, or olive) makes soft, satisfying chocolate chip cookies with less saturated fat. Perfect for health-conscious bakers or when you’re out of butter, these cookies are always a hit at parties or late-night cravings!
Making Cookies Without Butter-The Short Answer
Click the center play button to watch now
Why You’ll Love Making These Cookies Without Butter
This cookie recipe is perfect for a sweet treat without butter. When I realized I was out of butter, I discovered this alternative using vegetable oil. It results in a chocolatey, easy-to-make cookie with just a whisk and spatula—no mixers needed. Great for when you’re out of butter or want a healthier twist on a classic.
These cookies have golden brown, chewy centers and crispy edges that melt in your mouth. They’re dairy-free and can be made gluten-free or vegan by swapping ingredients. Ready in 20 minutes with no chill time, they offer the best chocolate chip experience. Trust me, you won’t miss the butter!
Are These Cookies Without Butter Still Soft & Chewy?
Yes, cookies without butter can be soft and chewy! This recipe uses oil for moisture, whole milk for the right fat content, and brown sugar for chewiness. Chilling the dough before baking prevents spreading and gives a thick texture. The result? Amazing chocolate chip cookies with a melt-in-the-mouth texture, just as satisfying as those made with butter!
Ingredients
Making cookies without butter still results in tender, soft treats. Use oils like vegetable, canola, or avocado oil for moisture and chewy texture. For dairy-free, substitute water for milk. I love melted coconut oil, but refined coconut oil has a neutral flavor.
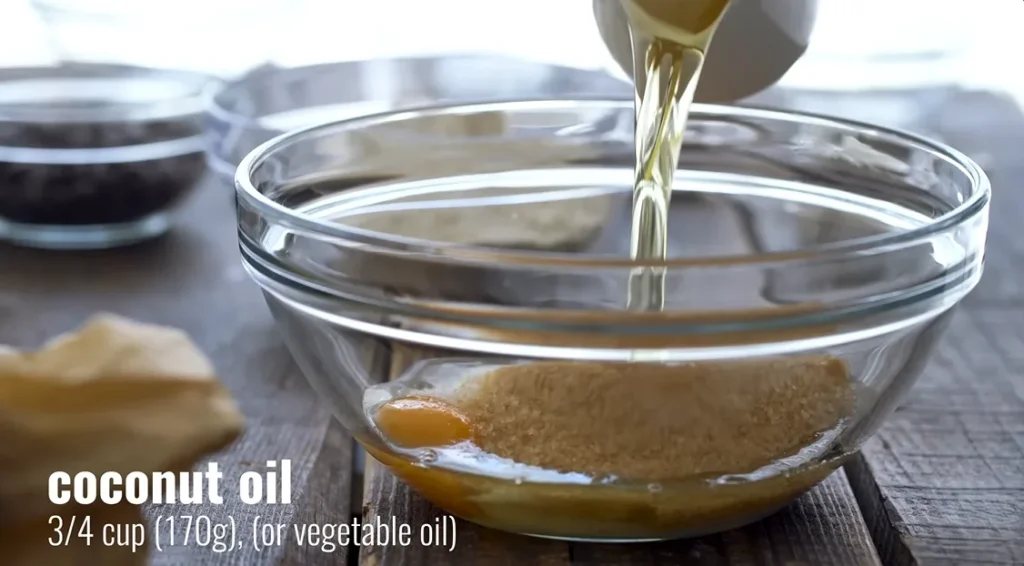
Use 6½ tbsp (91 gms) of oil and be mindful of smoke points at high temperatures.
The egg provides structure, but a flax egg works for vegans. Balance ½ cup white sugar and ½ cup brown sugar, with light brown sugar for a caramelly flavor. Add 1½ tsp vanilla extract. Use 1¾ cups all-purpose flour, or gluten-free flour and xanthan gum. Add ½ tsp baking soda and ½ tsp baking powder for a golden, fluffy result.
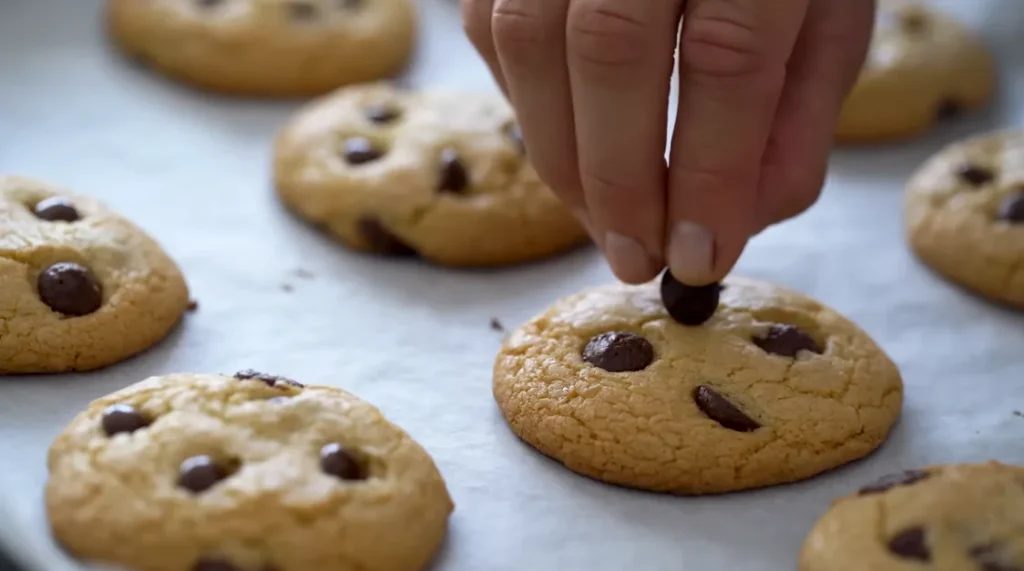
The key to great cookies is the chocolate chips. Use 1 cup (170 gms) of chocolate chips—semi-sweet, milk, or dark chocolate, or even chocolate chunks for bigger bites. Bake the dough balls at 350°F for 8-11 minutes. The result: delicious, chewy cookies with crisp edges. Let them rest on a cooling rack for 5 minutes before serving.
Step-by-Step Instructions
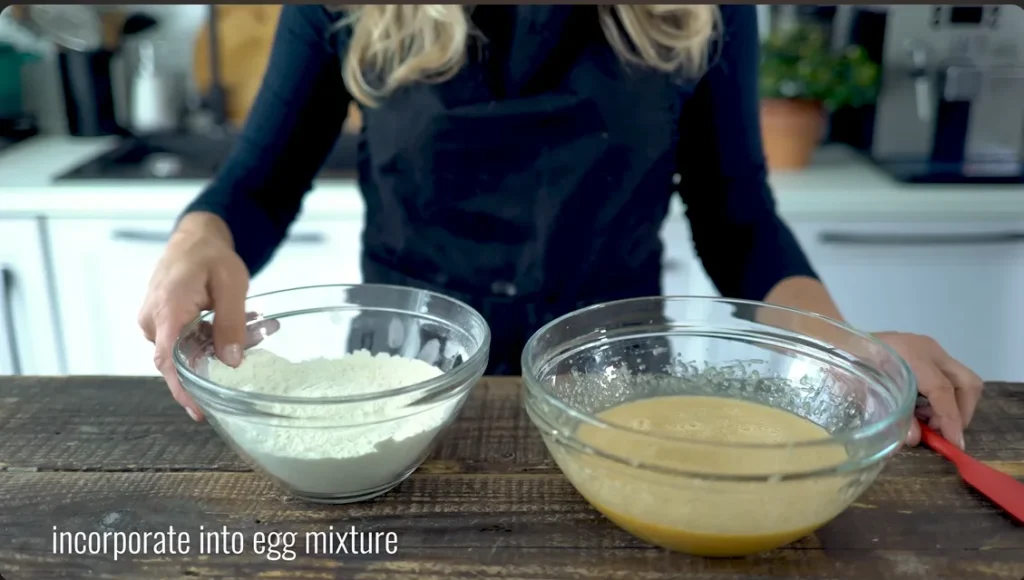
Preheat your oven to 350°F (180°C) and line your baking sheet with parchment paper. For accurate measurement, use a kitchen scale for all-purpose flour, or spoon and level it. Add baking soda, baking powder, and salt to a large bowl, then whisk until combined. Set the flour mixture aside. In a separate bowl, combine your wet ingredients:
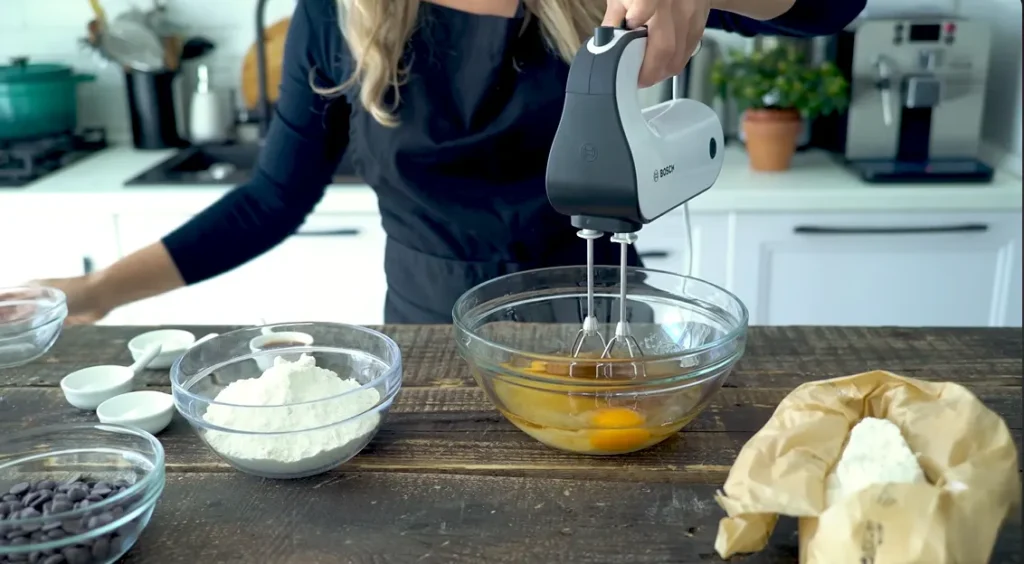
vegetable oil (or canola, avocado, or coconut oil), vanilla extract, white sugar, brown sugar, milk, and egg. Mix with a whisk or spatula—no electric mixer needed. Continue until you have a smooth, thick-ish liquid paste.
Once your wet ingredients are mixed, gently fold the flour mixture into the oil mixture with a spatula.
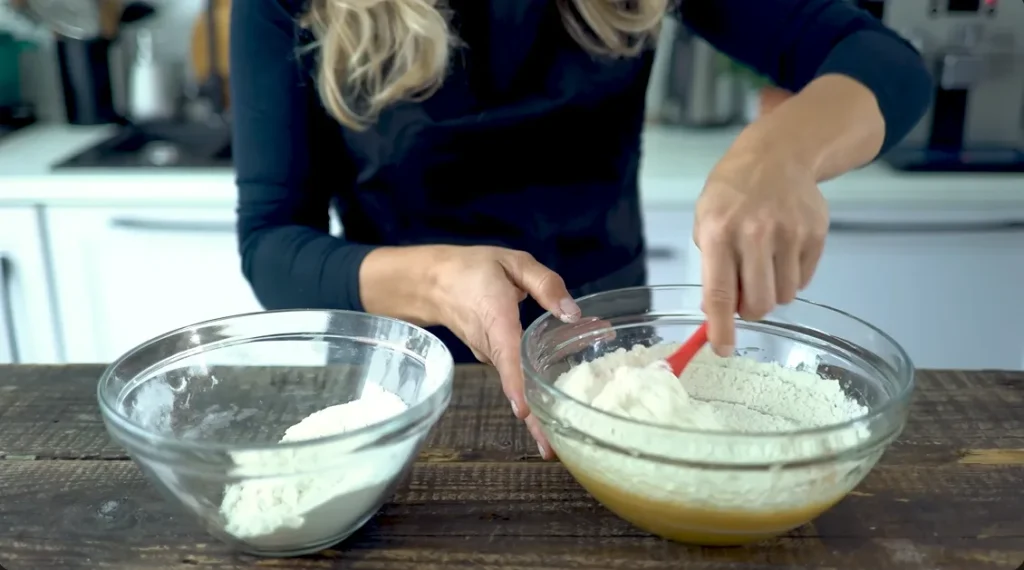
Don’t overmix—leave some clumps and streaks of flour. When mostly combined, stir in 1 cup of chocolate chips, ensuring they’re evenly distributed but without overmixing. Your dough should still have some texture.
Cover the cookie dough with plastic wrap and refrigerate for 20-30 minutes to hydrate the flour and prevent spreading. While it chills, prepare your baking sheet and preheat the oven. Once chilled, use a tablespoon or cookie scoop to form dough balls (1.5-2 tablespoons) and place them on the baking sheet, leaving 2-3 inches between each cookie.
Bake the cookies at 350°F for 12-13 minutes, until the edges are golden and the centers are slightly underbaked for a soft texture.
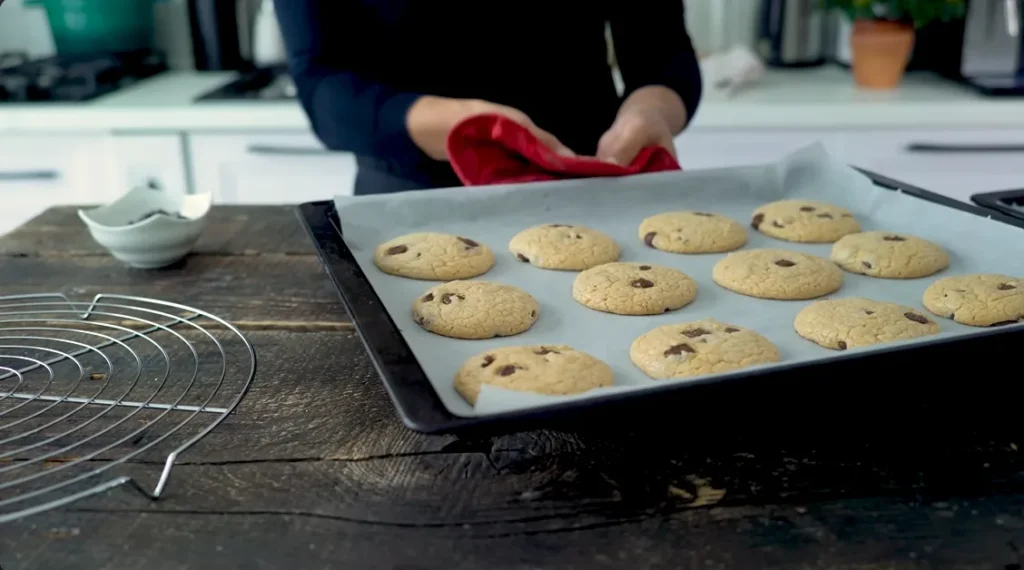
Let the cookies rest on the baking sheet for 5 minutes, then transfer to a wire rack to cool. Optionally, sprinkle flaky sea salt on top for extra flavor.
Instructions for Making Cookies Without Butter
When making cookies without butter, use a kitchen scale for accurate flour measurements. Mix dry ingredients with baking soda and baking powder, then combine with vegetable oil, canola oil, or avocado oil for a soft texture. Stir in chocolate chips without overmixing. Use a cookie scoop to portion the dough onto parchment-lined cookie sheets.
Check your oven with a thermometer before baking. Use lighter cookie sheets to avoid overbaking. Let cookies cool on the sheets, and for crispy edges, leave them at room temperature. Store dough for 3-4 days or freeze baked cookies for months. Reheat for a fresh texture. Add sea salt on warm cookies for a salty-sweet kick.
Storage Instructions
Once baked, store cookies in an airtight container or Ziploc bag at room temperature for up to 5-6 days. For longer storage, freeze in a freezer bag for up to 2 months. Thaw at room temperature when ready to enjoy.
Fun serving Suggestions
As an food explorer, I am trying my best to tell you all homemade recipes that you can enjoy at minimum cost and hygienic. I am giving you my other recipes which are related to Sweet Crawings. Some other recipes are giving below:
No Eggs, No Fuss: Perfect Peanut Butter Cookies in 3 Steps
No Milk? No Worries! The Best Pancakes You’ll Ever Taste
Secret Banana Bread Recipe with 2 Bananas Revealed
Fast & Fluffy Banana Bread with Self Rising Flour
Fail-Proof Waffle Recipe Without Milk for Beginners
Frequently Asked Questions (FAQs)
Can Oil Actually Give Good Chocolate Chip Cookies?
Yes, oil makes chocolate chip cookies soft and tender with a chewy, crispy texture. White sugar adds crispness, brown sugar enhances chewiness, and vanilla extract boosts flavor, resulting in delicious cookies.
What Type of Oil Should I Use for This Chocolate Chip Cookie Recipe Without Butter?
For this chocolate chip cookie recipe, use neutral oils like vegetable oil, canola oil, or avocado oil. Avoid extra-virgin olive oil, but light olive oil is fine. Melted coconut oil works, with unrefined offering a stronger coconut flavor and refined being milder.
What Are Some Common Mistakes to Avoid When Baking These Chocolate Chip Cookies Without Butter?
When baking cookies without butter, follow the recipe, measure ingredients accurately, and avoid overmixing to prevent tough cookies. Leave 2 inches between cookies on the sheet, chill the dough, and use proper measuring tools. Let hot cookie sheets cool before adding dough balls.
How Can I Keep My Butterless Cookies Fresh for Longer?
Store cookies in an airtight container at room temperature for 3-4 days. Reheat in the microwave for a few seconds. For longer storage, freeze baked cookies in a freezer bag for 2-3 months.