Oven baked chicken breasts are a reliable choice thanks to this 5-step method and its simple approach, letting you customize with your favorite seasonings. From trial-and-error, I’ve learned chicken breasts can be a finicky protein, often turning dry, rubbery, or flavorless. But with the right methods, you can get perfectly tender, juicy, and flavorful results every time.
What makes this recipe a game-changer is how easily you can customize it to your taste. I love how a quick dash of magic seasoning turns lean chicken into a delicious, caramelized meal. It’s great for meal prep and makes a fabulous dinner with a side dish. From my experience, this simple approach works every time—making this oven baked chicken breast recipe a true kitchen staple.
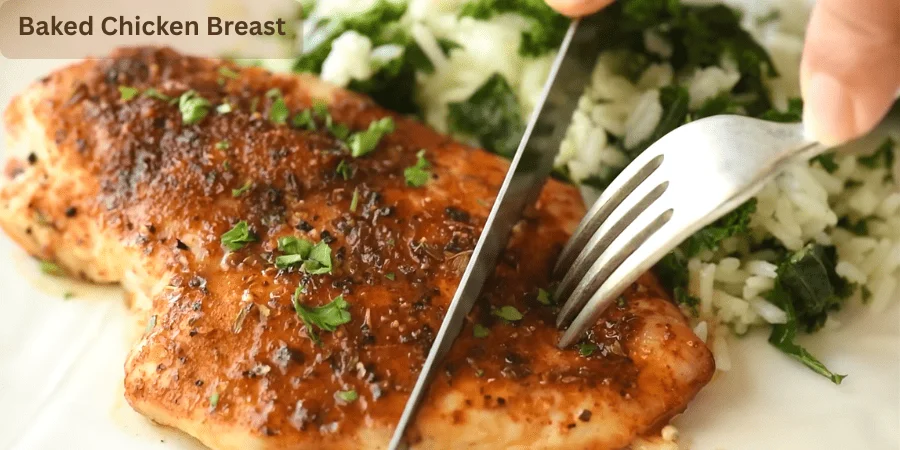
Baked Chicken Breast-The Short Answer
Ingredients for Perfectly Baked Chicken Breast
To achieve that tender, juicy, and flavorful baked chicken breasts, the right combination of ingredients and seasoning is essential. Here’s what you’ll need to make it perfect.
Chicken Breasts: Fresh or Frozen
- Boneless, skinless chicken breasts are ideal since they cook faster and stay tender.
- Use fresh chicken breasts, or thaw frozen chicken breasts fully before cooking.
- From my experience, pre-brined chicken adds extra moisture and flavor.
Seasoning: A Perfect Blend of Flavors
- I usually use smoked paprika, garlic powder, black pepper, and kosher salt; from my experience, this simple mix makes the chicken flavorful.
- You can customize it—I often suggest 1 teaspoon paprika, 1 teaspoon dried oregano, and 1/4 teaspoon garlic powder for balance.
Fat for Moisture: Butter or Olive Oil
- Butter adds rich flavor, though from my experience olive oil is a great lighter option.
- Use 1 tablespoon melted butter or 2 teaspoons olive oil to coat the chicken breasts before baking.
Sweetness and Flavor Balance
- Add 1½ tablespoons brown sugar to balance the savory flavor. From my experience, it adds mild sweetness without overpowering the chicken.
Cooking Thermometer: The Key to Perfect Chicken
- To ensure your chicken is perfectly cooked, use a cooking thermometer. An instant-read cooking thermometer or a dual-probe wireless meat thermometer is a great option.
- These thermometers, available on Amazon, will help ensure your chicken is neither over-cooked nor under-cooked, guaranteeing a juicy and tender result.
Extra Flavor Boost: Herbs and Seasonings
- Add 1 teaspoon Italian seasoning or 1 teaspoon onion powder for extra flavor.
- Add freshly-ground black pepper to taste and 1/2 teaspoon salt.
- From my experience, finely chopped parsley adds a fresh touch.
How To Bake Chicken Breasts
Baking chicken breasts is a simple way to make a delicious, healthy meal. From my experience, following a few key steps helps ensure they turn out perfectly every time.
Step 1: Brine Your Chicken
Brining your chicken before baking is an essential step to ensure it stays juicy and flavorful. Here’s how to do it:
- Fill a bowl with lukewarm water and add salt—about 1/4 cup for every 2 cups of water.
- Add ice or cold water until it feels cool.
- From my experience, soak chicken breasts at least 15 minutes (or refrigerate up to 6 hours).
- Rinse with cold water and pat dry with paper towels..
This step helps to tenderize the chicken and keeps it moist when baked.
Step 2: Brush with Butter or Oil
Once the chicken is prepped, it’s time to brush it with butter or olive oil. The choice of fat plays a role in the flavor and texture of your chicken:
- Butter adds a rich, golden crust, while olive oil is a lighter option.
- Brush the chicken on both sides to prevent it from sticking to the pan and to help the seasonings adhere better.
This step ensures that your chicken cooks evenly and develops a beautiful, crispy exterior.
Step 3: Season the Chicken
Seasoning is key to adding flavor to your baked chicken breasts. Here’s a simple seasoning mix you can use:
- Salt, pepper, garlic powder, and paprika are all you need for a balanced, flavorful taste.
- Sprinkle the seasoning mixture evenly over both sides of the chicken.
- Feel free to adjust the seasoning to suit your taste preferences.
This combination creates a savory profile that enhances the natural flavor of the chicken without overwhelming it.
Step 4: Roast the Chicken
Now it’s time to roast the chicken. The high heat helps to lock in moisture and achieve a crispy exterior:
- Preheat oven to 450°F for best results.
- Bake 15-18 minutes for a crispy outside and juicy inside.
- From my experience, use a cooking thermometer to ensure 165°F for fully cooked chicken.
Make sure not to overcook, as this can result in dry chicken.
Step 5: Let the Chicken Rest
Resting the chicken after baking is crucial for maintaining its tenderness and juiciness:
- Transfer chicken to a cutting board or plate.
- Loosely cover with foil and rest 5-10 minutes to keep juices inside.
- From my experience, cutting too soon lets the juices escape, making it dry.
After the chicken has rested, it’s ready to be sliced and served with your favorite sides.
How To Store Baked Chicken Breasts
- For meal prep, store in an airtight container in the fridge up to 4 days; reheating in the microwave is quick.
- For longer storage, freeze up to 3 months—shred, dice, or slice first for convenience.
- Keep fridge-stored chicken in a sealed container to stay fresh and odor-free.
Baked Chicken Breast: A Healthy Meal Option
When you want a nutritious, delicious meal, baked chicken breast is a go-to. From my experience, it’s low in fat and high in protein, perfect for calorie-conscious eaters or anyone building muscle.
Nutritional Breakdown (per serving: 158g)
- Calories: 286cal
- Protein: 46g
- Fat: 7g
- Carbohydrates: 4g
- Cholesterol: 127mg
- Sodium: 403mg
- Potassium: 397mg
- Sugar: 4g
- Vitamin A: 325IU
- Vitamin C: 1.7mg
- Calcium: 11mg
- Iron: 0.6mg
Alternative Serving Size (1 chicken breast)
- Calories: 264kcal
- Protein: 24g
- Fat: 17g
- Carbohydrates: 3g
- Cholesterol: 72mg
- Sodium: 1296mg
- Fiber: 1g
- Sugar: 0.2g
Why Choose Baked Chicken Breast?
- High in protein (helps with muscle building and repair)
- Low in fat but packed with essential nutrients
- A great source of potassium and vitamins
- Convenient and easy to prepare
Baked chicken breast is a simple way to fuel your body with high-quality nutrition. From my experience, whether for meal prep or a quick dinner, it delivers protein, healthy fats, and essential vitamins and minerals in one serving.
Notes and Pro Tips
Ensure even cooking by pounding chicken to 1.5 cm (½ inch) or cutting thick breasts in half. From my experience, metal baking sheets handle high heat better than glass dishes, which usually max at 425°F, giving a more even cook.
Monitor the internal temperature of the chicken, which should reach 165°F to be fully cooked. From my experience, let it rest for about 5 minutes to keep the juices inside, making it tender and juicy. Try different seasoning blends like taco or chili, or use a seasoning paste made from oil and spices for extra flavor.
Variations You Can Try
As a food enthusiast, I am trying my best to tell you all homemade recipes that you can enjoy at minimum cost and hygienic. I am giving you my other recipes which are related to Chef’s Special. Some other recipes are giving below:
Flavor-Packed Panko Chicken Breasts Recipe You’ll Love
Unlock the Secret to Perfect Korean Soy Garlic Chicken!
No Cream Cheese? No Problem! Buffalo Chicken Dip That Rocks!
The Secret to Crispy Fried Chicken Breast – Try This Recipe!
I hope you will visit all these recipes and enjoy my recipes because it will boosts your craze for homemade products which are better than restaurant products. I also bet that when you try first time it will boost your taste and you will become addictive to these recipes.
FAQs
Is it better to bake chicken at 350 or 400 in the oven?
Baking at 400°F is ideal for crispy skin and juicy meat, especially when short on time. From my experience, 350°F works better for larger cuts or a longer cook for moist results, though the skin won’t be as crispy.
How long do you bake chicken breasts in the oven at 400 degrees?
At 400°F, bake chicken breasts 21–26 minutes, depending on size, for juicy, tender meat with a crispy outer layer. From my experience, let it rest after baking so the juices redistribute.
How to bake a chicken breast so it’s not dry?
To prevent dryness, bake chicken breasts at 450°F for a short time to seal in juices and keep the meat tender. From my experience, avoid prolonged cooking at 350°F, which can dry it out.
How do I prevent chicken from drying out in the oven?
Ensure chicken breast is well-seasoned and cook both sides evenly until brown. From my experience, bake in a preheated oven until juices run clear; the seared crispy skin helps retain juices while keeping the inside moist.
What’s the secret to juicy chicken?
The secret to juicy chicken is to quickly sear it on the stovetop, then finish cooking in its own juices in a covered pan. From my experience, this keeps it moist and tender without drying out.
What is the best marinade for chicken?
For a delicious marinade, mix oil, soy sauce, Worcestershire sauce, wine vinegar, and lemon juice. Add mustard powder, salt, pepper, and parsley for extra flavor. The longer you let the chicken marinate, the more flavorful it becomes.
Do you rinse chicken breasts before baking?
It’s best not to wash chicken breasts before baking. From my experience, unlike fruits and vegetables, raw poultry can spread harmful bacteria, but cooking at the right temperature destroys pathogens.