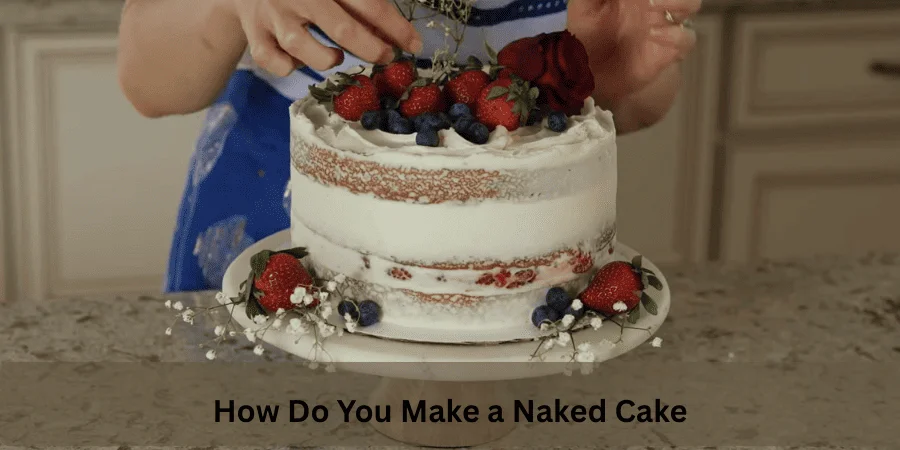
Creating a naked cake is simple and elegant. Start with a vanilla cake recipe or a firm cake, then add vanilla buttercream or frosting, keeping the layers exposed. Use this step by step tutorial to guide you, especially if you’re a beginner.
Decorate your cake with fresh berries, fruits, and flowers for color and freshness. Semi naked cake or unfrosted wedding cake are perfect for weddings, birthday parties, and baby shower cakes. A blue velvet cake with yellow buttercream icing and blackberries is a popular choice for a simple, beautiful design.
Naked Cake-The Short Answer
What Is a Naked Cake?
- Naked cakes, with minimal frosting on the outside, are a popular choice for various celebrations. Here’s why they stand out:
- Rustic-chic presentation perfect for weddings, baby showers, bridal showers, and party scenes.
- Christina Tosi from Milk Bar started the trend in 2013, highlighting the cake layers and filling instead of just the frosting.
- These cakes offer creative control, allowing you to decorate in a unique way, making the whole recipe and process 100x more fun.
Two Types of Naked Cakes
Semi-naked Cake:
- Apply a minimal amount of frosting around the sides of the cake.
- Leave some filling and cake layers exposed for a subtle, crumb-coated look.
- This style allows for a simplified design, where the frosting is kept light.
Pure Naked Cake:
- Leave the sides exposed with no frosting at all.
- The filling and layers are fully exposed, showcasing the cake’s natural beauty.
- Focus on a clean and simple look with no frosting layers, emphasizing the exposed filling and cake texture.
Ingredient Breakdown and Styling Choices
- Ingredients list begins with 3 3/4 cups 443g sifted all-purpose flour, spooned and leveled, plus 2 teaspoons baking powder, 3/4 teaspoon baking soda, and 1 teaspoon salt
- Cream 1 1/2 cups 340g unsalted butter, softened to room temperature, with 2 cups 400g granulated sugar
- Mix in 5 large eggs at room temperature, 1 Tablespoon pure vanilla extract, yes Tbsp, and 1 3/4 cups 420ml buttermilk
- Layer with optional 1–2 cups fresh raspberries or other berry.
- Frost lightly using Vanilla Buttercream or American Buttercream Frosting made from 5–6 cups 600–720g confectioners’ sugar, 5–6 Tablespoons 75–90ml heavy cream, and 1/4 teaspoon finishing decorations, see post above for inspiration
- For scaled batches, use Ingredients 1x, 2x, 3x with 2¼ cups All-purpose flour, 1¼ cups Granulated sugar, 1½ cup Soy milk or almond milk, ¾ cup Oil, 1 tablespoon Vanilla extract, ¾ teaspoon Baking soda, ⅛ teaspoon Salt, and 3 tablespoon Lemon juice
- Finish naturally with Blue gel coloring, Decoration, 4 cups, Yellow color, 1 cup Blueberries, Fresh Washed patted dry, and purple flowers and leaves
- Bake smoothly using Cook Mode to Prevent your screen from going dark
Baking a Semi-Naked Cake (Concise & Practical)
- Before I bake, I plan the cake I am making, whether single, standalone, or in tiers. Before baking, I check pans like 6” and 8”, plan 3 layers, keep an inch of difference between each tier, and recommend any flavour and colour that shows through the semi-naked frosting after cooling.
- After baking, I level the cake with a serrated bread knife or wire leveller. This cut keeps layers straight, reduces crumbs, and avoids crumbly edges. I wrap the layers in plastic, keep them wrapped in the freezer overnight or thirty minutes, so the cold sponge chills, stays firm, and is easier to work with at room temperature.
- To assemble, I use a cardboard board or drum with greaseproof lining on a non-slip mat. A dot of buttercream acts as glue to attach the first layer in the center. I pipe or spread the filling, flatten it, place the next layer directly above, adjust by eye, spin the turntable, and check the sides for a balanced look.
- For frosting, consistency is important. Buttercream should be softer, not stiff, so it can glide instead of pull. I add a generous amount, scrape with a cake comb, repeat scraping, remove excess, and keep a thin, smooth, neat finish using an offset spatula at a 45 degree angle with a clean push and swipe.
- For a tier or wedding cake, I prepare support with boba straws. I cut each straw to the same height, place four in a square formation, and push them underneath the top tier so the assembled cake stays secure, supports weight, and handles transportation and display after 15 minutes or an hour in the fridge.
- During stacking, I lift, lower, and touch only the sides once the frosting has set and hardened. I trim any wider side, mark a line, fix the seam with piping, spread to conceal gaps, and repeat these steps to make the whole cake look tidy and strong.
Notes
Planning for Better Flavor
- Plan and think about the style of a naked or semi-naked cake first; decorations and garnishes determine how much frosting you need.
- Prepare cake pans appropriately using quality tools; grease well so cakes release easily with nonstick spray.
- For even layers, measure an equal amount of batter using the easiest, most accurate way—a kitchen scale.
Building Even Layers
- Place the pan on top of the scale, begin pouring, repeat for all pans, making sure each weighs the same.
- Level the cakes and level off each cake layer so both sides are flat; this is important to add stability to the finished cake.
- Use a cake leveler or large serrated knife, and always keep the process simple and easy for yourself.
Enhancing Moisture and Taste
- Follow a recipe with straightforward instructions; I’ve seen many naked cake recipes that call for a soak in simple syrup to prevent drying.
- That’s an absolutely valid route, especially for a true naked cake, but I don’t find it necessary if the cake is already moist, like a vanilla base.
- Instead of piping frosting between each layer, spread it with an icing spatula—a real timesaver and simplified step.
Frosting and Temperature Control
- A frosting recipe that yields about 4.5 cups works well: 1.5 cups per layer and 1.5 cups around the cake.
- The refrigerator is your best friend: chill the cake a few hours before slicing and serving.
- This stabilizes your hard work, helps frosting adhere, and ensures a neater slice.
Ingredients, Fillings, and Decoration
- Layers should be baked, cooled, and covered tightly overnight; frosting prepared, refrigerated, then assemble and frost the next day when ready to serve.
- Use edible flowers and leaves that are safe and non-poisonous; ask a florist if unsure.
- Avoid thin, runny frostings like whipped cream that start dripping over the cake; for runny fillings, create a dam with buttercream and fill the center with jam.
Storage, Tiers, and Stability
- For a tiered naked cake, thickness, balance, and proper support matter—don’t forget dowels or bubble tea straws to prevent unstable sagging.
- Chill cakes to reduce crumbling and mess, then refrigerate the completed cake so frosting can firm up and hold shapes.
- Leftovers stay stored in a sealed container in the fridge for days.
Decoration Assists That Make the Process Easier
- Helpful tools are essential when decorating a semi-naked cake because they make the job more controlled and clean
- I prefer a straight spatula over an offset one to apply frosting, as it fits my hands, works better for me, and feels easier to use
- Running the spatula along the sides helps keep the finish smooth
- A bench scraper is great for refining the surface and cleaning edges
- A turntable is optional, but many decorators have told me it is needed because it makes movement and control much simpler.
My Other Recommended Homemade Recipes
Learning How Do You Make a Naked Cake Like a Pro? starts with mastering simple techniques—clean layers, light frosting, and elegant decoration that suit special occasions like weddings and celebrations. Once you’re comfortable with cake basics, expanding your baking knowledge helps refine your results, whether it’s understanding flavors, textures, or ingredient behavior across different desserts.
To deepen your baking expertise, explore related guides like Chocolate Milk vs Hot Chocolate: What’s the Difference?, Want Perfect Cookies? Try These Amazing Egg Substitutes, and Caramel-Style Apple Cinnamon Empanadas (Baked or Fried) for ingredient and flavor inspiration. You can also sharpen your skills with enriched doughs and classic treats by checking out Cheese Babka Recipe with Rich, Creamy Filling and Classic Chocolate Chip Cookie Sticks Recipe, which complement professional-level cake decorating perfectly.