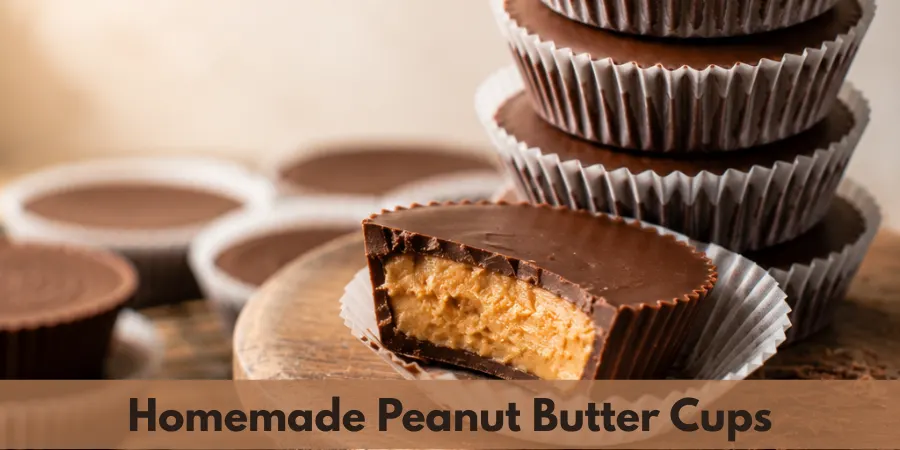
These homemade peanut butter cups are made with just 6 simple ingredients and deliver a rich chocolate dessert with a creamy peanut butter filling and the perfect balance of sweet and salty flavors.
These homemade peanut butter cups are easy to make with simple pantry ingredients and require just 15 minutes of hands-on time. After assembling, let the refrigerator do the rest, making them a perfect make-ahead dessert for holidays, parties, or whenever you crave a homemade sweet treat.
Homemade Peanut Butter Cups-The Short Answer
Living in Australia, where Reese’s Peanut Butter Cups can be expensive, inspired me to make them at home. After trying different methods, I found a reliable way to keep the creamy peanut butter filling fully coated in chocolate with neat layers and a smooth finish.
Why You’ll Love These Homemade Peanut Butter Cups
These homemade peanut butter cups are the perfect combination of creamy peanut butter filling and smooth chocolate coating. They are simple to make, easy to customize, and require no complicated baking techniques.
You’ll love this recipe because:
- Only 6 simple ingredients are needed to create a rich homemade treat.
- No baking is required, making them quick and easy to prepare.
- The creamy peanut butter filling is completely covered with chocolate for the classic peanut butter cup experience.
- They taste similar to Reese’s Peanut Butter Cups while using simple homemade ingredients.
- They are freezer-friendly and perfect for making ahead.
- The recipe can be customized with different chocolates, peanut butter varieties, or toppings.
- They are ideal for holidays, dessert trays, gifts, or everyday sweet cravings.
Whether you enjoy them chilled from the refrigerator or slightly softened after sitting at room temperature, these homemade peanut butter cups are a simple dessert that feels special for any occasion.
Ingredients
Every great batch of homemade peanut butter cups starts with a smooth, balanced filling and a chocolate coating that sets properly. Using quality ingredients and following the right proportions helps create clean layers, a creamy center, and a rich chocolate finish.
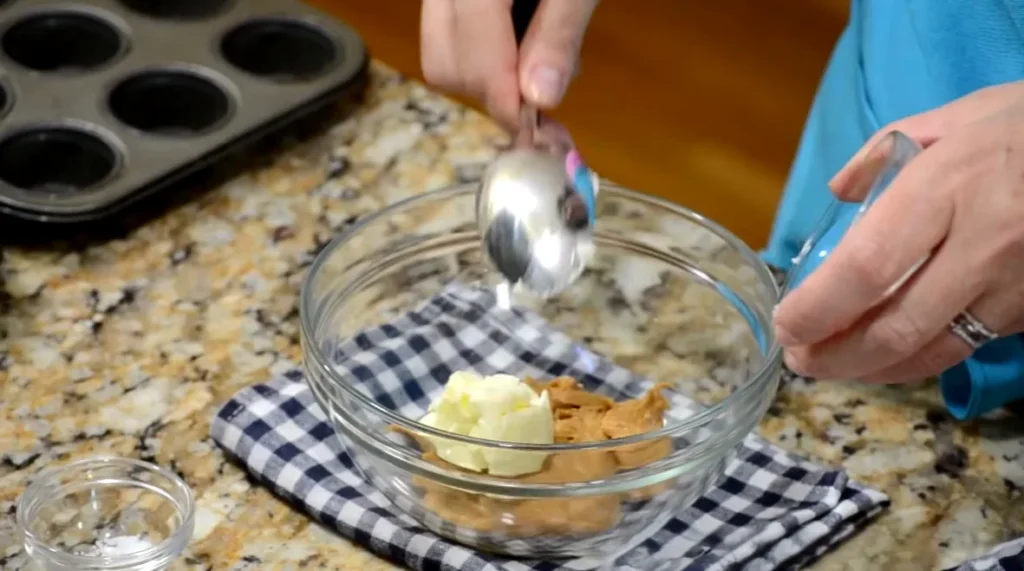
Peanut Butter Filling
For the filling, you will need:
- 1/2 cup (129 g) creamy peanut butter
- 3 tablespoons (43 g) unsalted butter, softened to room temperature
- 1/4 cup (31 g) confectioners’ sugar (also called icing sugar or powdered sugar)
- 1/4 teaspoon vanilla extract
- A pinch of kosher salt
Creamy peanut butter creates the smoothest filling, while crunchy peanut butter can be used if you prefer extra texture. If you need a peanut-free alternative, almond butter or cashew butter can also work well.
Softened butter helps create a smooth, dough-like filling that is easy to shape into discs. Confectioners’ sugar adds sweetness while helping the filling hold its structure.
For a deeper flavor, you can add a small amount of brown sugar if desired.
Chocolate Coating
For the chocolate shell, use:
- 2½ cups (425 g) milk chocolate chips
If you prefer a smoother coating, you can use:
- 500 g (16 oz) melting chocolate
Milk chocolate creates the classic peanut butter cup flavor, while dark chocolate, semi-sweet chocolate, or white chocolate can be used for different variations.
Melting chocolate usually creates a smoother and shinier coating, but regular chocolate chips also work well. If needed, melt a little extra chocolate to ensure each peanut butter cup is completely covered.
Ingredient Notes
Small adjustments can change the final texture and flavor of these homemade peanut butter cups.
A slightly richer filling can be created by adding a little more peanut butter, while extra powdered sugar creates a sweeter and firmer filling. These simple changes allow you to customize the recipe while keeping the chocolate and peanut butter balance intact.
For the best results, keep the peanut butter filling firm enough to shape into discs and ensure the chocolate layer fully surrounds the filling for clean, professional-looking peanut butter cups.
How To Cook
Making homemade peanut butter cups is simple, but following the right order helps create clean chocolate layers and a smooth peanut butter filling. The key is allowing each chocolate layer to set properly so the filling stays completely covered and the finished cups have a neat appearance.
Prepare the Peanut Butter Filling
Line a standard 12-cup muffin tin with paper liners. If you prefer smaller treats, you can also use mini muffin tins with paper liners.
In a medium bowl, combine:
- 1/2 cup (129 g) creamy peanut butter
- 3 tablespoons (43 g) unsalted butter, softened
- 1/4 cup (31 g) confectioners’ sugar
- 1/4 teaspoon vanilla extract
- A pinch of kosher salt
Mix until the filling becomes smooth and creamy.
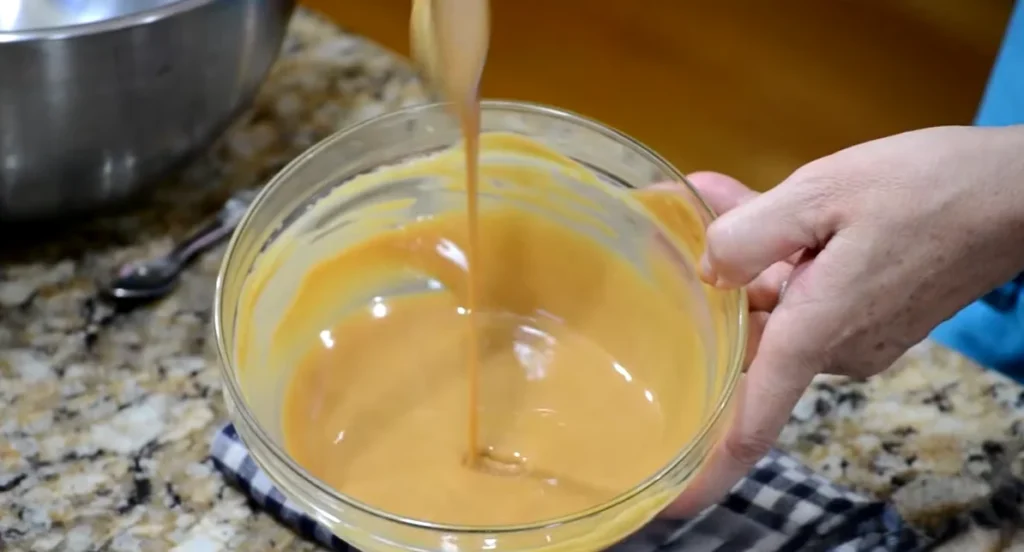
Scoop the filling, roll it into a ball, then gently flatten it into a disc that fits neatly inside each muffin cup. Creating evenly shaped discs helps the filling sit properly between the chocolate layers.
Melt the Chocolate
Add the chocolate chips or half of the melting chocolate to a microwave-safe bowl.
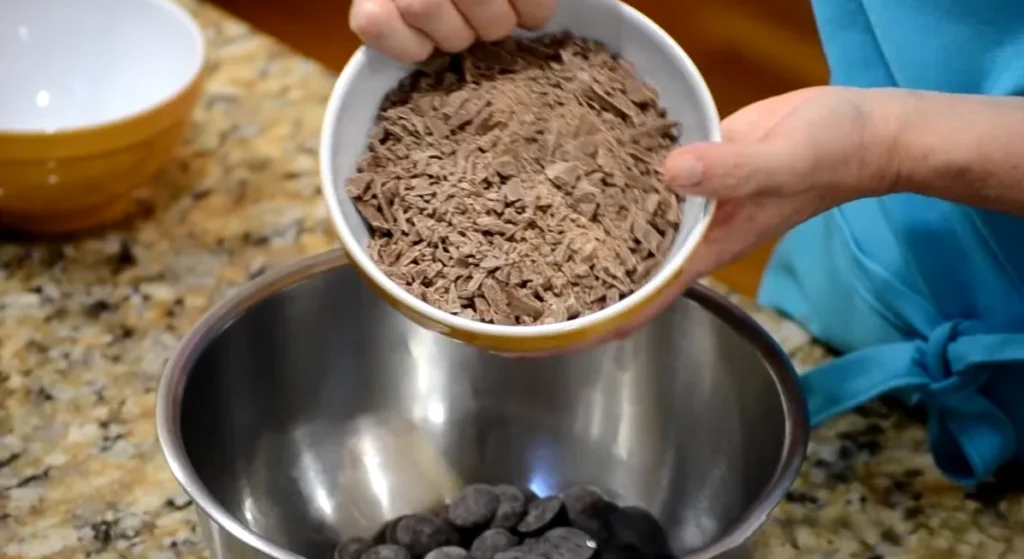
Microwave in 20–30 second intervals, stirring well after each interval until the chocolate is completely melted and smooth. If small pieces remain, continue stirring until they melt from the residual heat.
Allow the melted chocolate to cool slightly before assembling the peanut butter cups.
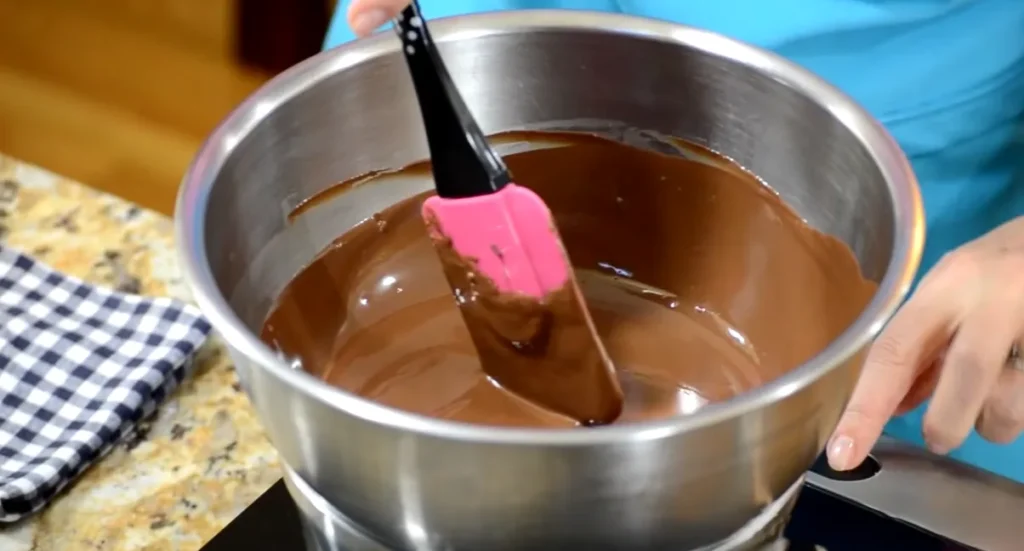
This helps prevent the filling from becoming too soft when added.
Assemble the Peanut Butter Cups
Spoon about 1 tablespoon of melted chocolate into the bottom of each paper liner, making sure the base is completely covered.
Place about 2 teaspoons of the peanut butter filling in the center of each cup. Press gently if needed so the filling sits evenly on the chocolate layer.
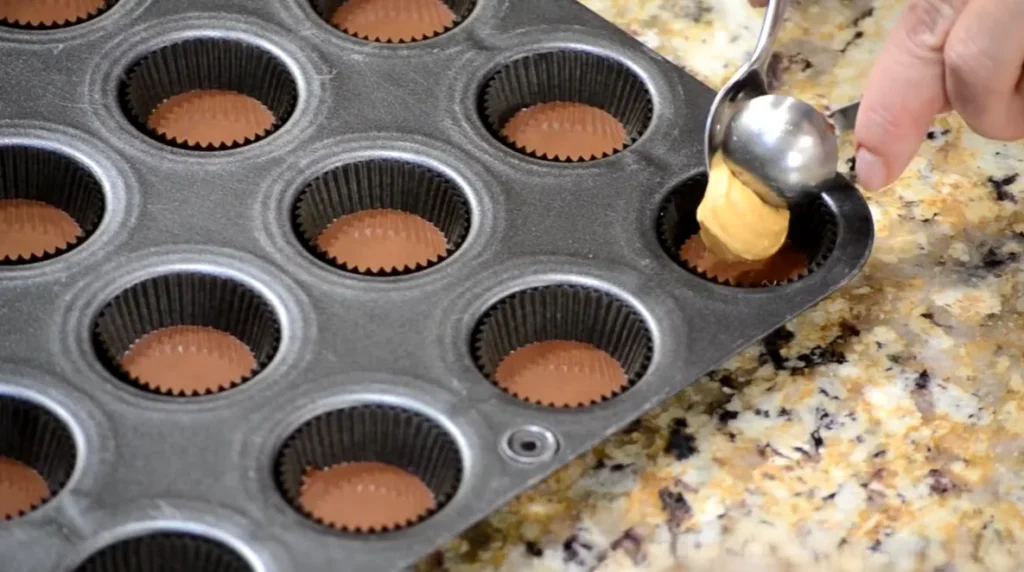
Cover the filling with another tablespoon of melted chocolate, spreading it carefully to completely seal the edges. The chocolate should fully surround the peanut butter filling to create a clean peanut butter cup shape.
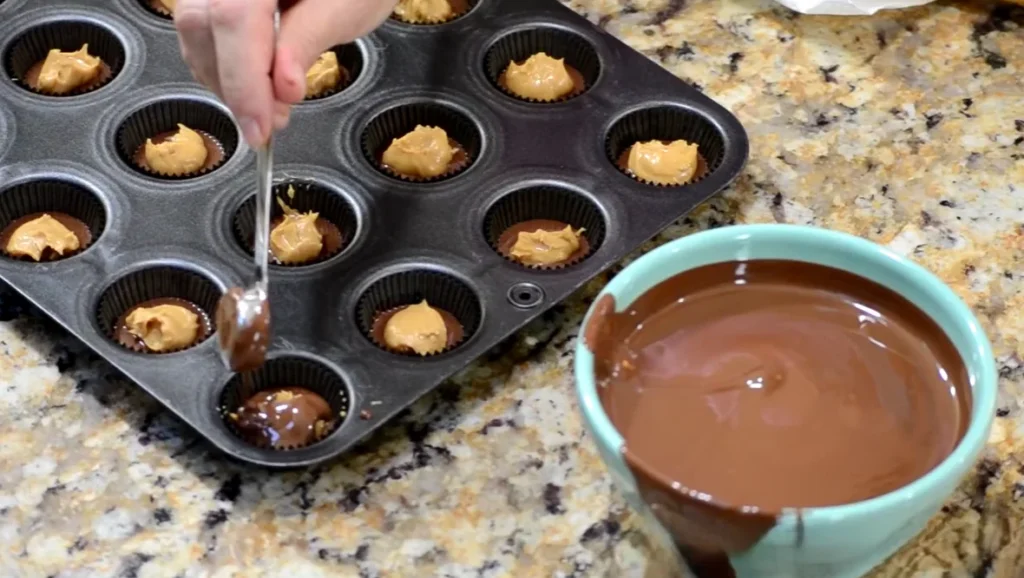
If using mini muffin tins, use about 1½–2 teaspoons of chocolate per layer instead.
Lightly tap the muffin tin on the countertop to level the chocolate and remove any air bubbles.
Chill Until Set
Refrigerate the peanut butter cups for about 1 hour, or until the chocolate is completely firm.
Once set, carefully remove them from the paper liners and serve.
For the best texture, allow refrigerated peanut butter cups to sit at room temperature for a few minutes before eating. This slightly softens the filling while keeping the chocolate shell firm.
Serving Ideas
Homemade peanut butter cups are an easy make-ahead dessert that can be enjoyed whenever a sweet craving hits. Since they store well in the freezer, they are convenient to prepare ahead for busy days, holidays, or unexpected guests.
Serve them as part of a dessert spread, arrange them on a dessert platter, or include them in holiday treat boxes. They are a great addition to:
- Holiday celebrations
- Family gatherings
- Party dessert tables
- Homemade gift boxes
- Everyday sweet snacks
Because these peanut butter cups can be prepared in advance, they are an easy homemade dessert that is ready whenever you need a simple chocolate treat.
Storage
Proper storage helps keep homemade peanut butter cups fresh while maintaining the smooth chocolate coating and creamy peanut butter filling.
Place the peanut butter cups in an airtight container to protect them from refrigerator odors and excess moisture. Store them in the refrigerator for up to 2 weeks.
For longer storage, transfer the peanut butter cups to a freezer-safe container and freeze them for up to 3 months. When ready to serve, allow them to sit at room temperature for 5–10 minutes. This helps soften the filling slightly and creates a creamier texture while keeping the chocolate shell firm.
Because these peanut butter cups freeze well, they are a great make-ahead dessert for holidays, parties, or whenever you want a homemade treat ready to enjoy.
Chocolate Options
The type of chocolate you use can slightly change the flavor and texture of the finished peanut butter cups.
Milk chocolate creates the classic sweet flavor similar to traditional peanut butter cups, while semi-sweet chocolate adds a deeper chocolate taste. Dark chocolate provides a richer, less sweet finish, and white chocolate creates a sweeter dessert with a creamy vanilla flavor.
You can also combine different types of chocolate to create a more complex flavor. For the smoothest coating, melting chocolate usually provides a shinier finish, but regular chocolate chips work well too.
Tips for the Best Homemade Peanut Butter Cups
Keep the Filling Firm Enough to Shape
The peanut butter filling should have a dough-like consistency that can be rolled and flattened into discs.
If the filling feels too soft, chill it briefly before shaping. A firmer filling makes it easier to create clean layers and prevents it from spreading into the chocolate coating.
Fully Cover the Peanut Butter Filling
Make sure the bottom chocolate layer is completely covered before adding the filling.
When adding the top chocolate layer, spread it all the way to the edges to seal the filling inside. This creates the classic peanut butter cup shape and prevents exposed filling.
Allow Each Layer to Set Properly
The chocolate base should be firm enough to support the filling before adding the next layer.
Following the chilling process helps prevent the weight of the top chocolate layer from pushing the filling through the base.
Customize the Flavor
These homemade peanut butter cups are easy to customize.
Try:
- Crunchy peanut butter for extra texture.
- Dark chocolate for a richer flavor.
- White chocolate for a sweeter variation.
- Flaky sea salt on top for a sweet and salty finish.
- Different chocolate combinations for a unique dessert.
Nutritional Status
The nutritional values below are estimates for one homemade peanut butter cup and may vary depending on the brands of chocolate, peanut butter, and other ingredients used.
Based on a recipe that yields 12 servings, each peanut butter cup contains approximately:
- Calories: 205 kcal
- Carbohydrates: 18 g
- Protein: 3.5 g
- Total Fat: 14 g
- Saturated Fat: 6 g
- Sodium: 95 mg
- Fiber: 1.5 g
These values are estimates and may change slightly depending on ingredient choices and portion size. Enjoying homemade peanut butter cups in moderation allows them to be part of a balanced dessert routine.
Frequently Asked Questions
Can I use crunchy peanut butter instead of creamy?
Yes. Crunchy peanut butter works well if you prefer extra texture in the filling. The flavor will remain the same, but the filling will have small peanut pieces throughout.
Can I use different chocolate for peanut butter cups?
Yes. Milk chocolate, semi-sweet chocolate, dark chocolate, and white chocolate can all be used depending on your preference.
Each option creates a slightly different flavor, so you can choose the one that best matches your taste.
Why is my chocolate layer cracking?
Chocolate can crack if the peanut butter cups are very cold and exposed to sudden temperature changes.
Allowing them to sit at room temperature for 5–10 minutes before serving can help create a smoother bite.
How long do homemade peanut butter cups last?
When stored in an airtight container, homemade peanut butter cups last up to 2 weeks in the refrigerator.
For longer storage, freeze them for up to 3 months and allow them to soften slightly before serving.
Can I freeze homemade peanut butter cups?
Yes. These peanut butter cups freeze very well.
Store them in a freezer-safe container for up to 3 months. Thaw them slightly before serving so the peanut butter filling becomes creamy again.
Final Thoughts
Homemade peanut butter cups are a simple no-bake dessert that combines creamy peanut butter filling with a smooth chocolate shell. With only 6 ingredients and a little preparation time, they create a homemade treat that feels special without being complicated.
The best part about this recipe is how flexible it is. You can use different chocolates, adjust the filling texture, prepare them ahead, or keep a batch in the freezer for whenever a sweet craving arrives.
Whether you make them for holidays, dessert trays, gifts, or a simple homemade snack, these peanut butter cups are a classic treat that is worth making again and again.