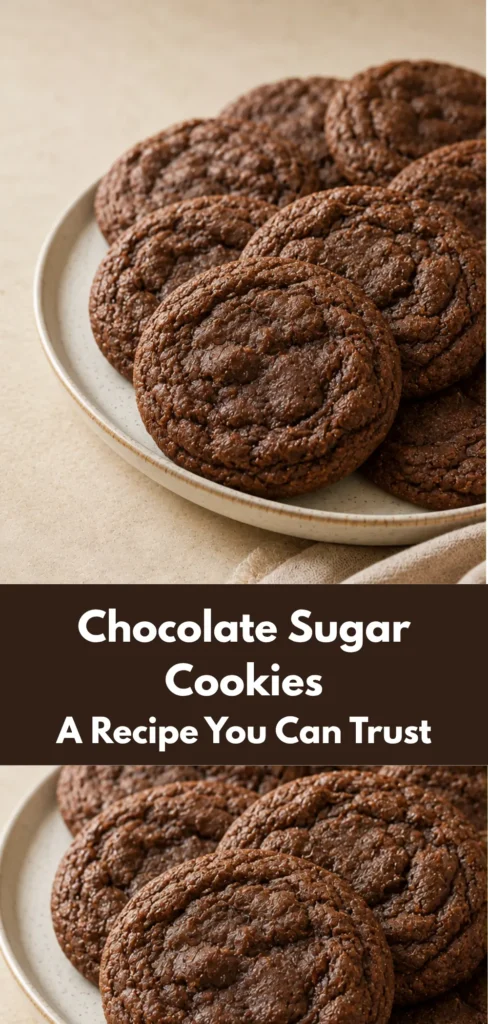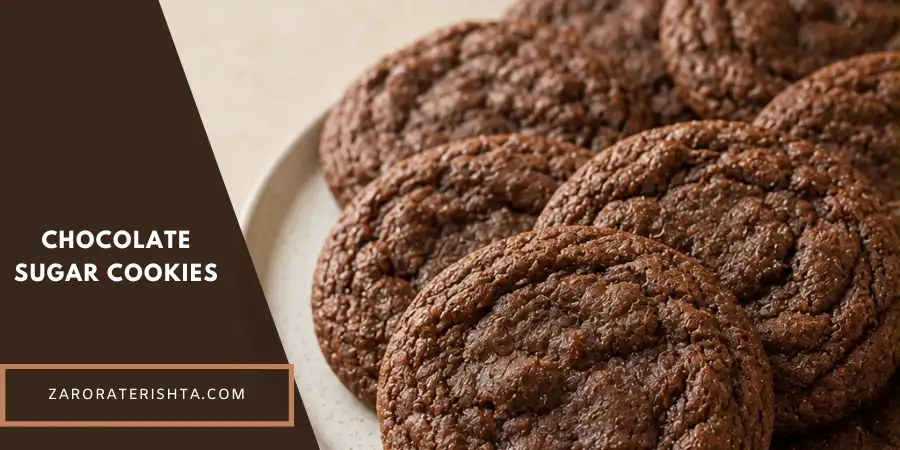
I’ve always enjoyed classic sugar cookies, but adding cocoa creates a deeper chocolate flavor while keeping the familiar appeal of a traditional sugar cookie. These chocolate sugar cookies have soft, chewy centers, lightly crisp edges, and a sugar-coated surface that develops the characteristic cracks as they bake.
The dough is straightforward to prepare and portion, making these cookies a practical choice when you want something rich and chocolatey without using complicated techniques. The combination of cocoa, brown sugar, butter, and sugar creates a cookie with a balanced texture rather than a heavy or cakey result.
Chocolate Sugar Cookies The Short Answer
Dark brown sugar and cocoa powder are key to the final texture and flavor. The brown sugar provides moisture and chewiness, while granulated sugar adds sweetness and helps the exterior develop a crisp, crackly finish.
Baking soda also plays an important role in how these cookies behave in the oven. As the cookies bake, they rise and then settle as they cool, creating the signature rise-and-fall effect that helps produce their soft centers and cracked surfaces.
One detail that makes this recipe different is the no-chill method. The shaped dough balls go directly into a fully preheated oven instead of being refrigerated. This allows the dough to respond quickly during baking and helps preserve the intended spread, rise, and crackly sugar crust.
The recipe makes a consistent batch of 16 cookies, with each portion weighing 53 g before baking. After baking, the cookies rest on the baking sheet for about 10 minutes so the residual heat can help the centers finish setting before they are moved to a cooling rack.
Why You’ll Love These Chocolate Sugar Cookies
These cookies have a rich chocolate flavor with a texture that balances a chewy center and lightly crisp edges. The sugar-coated exterior creates a visible crackled surface that makes them different from softer, cakier chocolate cookies.
The center should still feel slightly soft when the cookies come out of the oven because they continue setting as they cool. This helps create the tender, chewy texture that makes the cookies satisfying without becoming dry or crumbly.
They are also easy to make with familiar ingredients and require no chilling step for the shaped dough. The dough is portioned, rolled in sugar, and baked immediately so the cookies can develop their characteristic rise-and-fall behavior and crackly finish.
Each cookie portion is controlled at 53 g, which helps create consistent baking results across the batch. Once completely cooled and stored properly, the cookies can maintain their soft texture for several days, with best quality generally around 4–7 days.
The combination of deep chocolate flavor, a tender center, lightly crisp edges, and a crunchy sugar coating makes these chocolate sugar cookies a satisfying choice when you want a rich cookie without a heavy texture.
Ingredients
These chocolate sugar cookies use familiar pantry ingredients, but each component has a specific role in creating the chewy center, lightly crisp edges, deep chocolate flavor, and crackly sugar coating.
For the dry ingredients, use:
- 250 g all-purpose flour
- 45 g unsweetened cocoa powder
- 5 g baking soda
- 3 g fine sea salt
The flour and cocoa powder create the structure and chocolate base of the cookies. A kitchen scale is recommended for measuring both because small differences in flour or cocoa can affect the final texture.
Natural or Dutch-process cocoa can both be used, although they may create differences in flavor intensity and color. If the cocoa powder is lumpy, sift it before mixing so it distributes evenly throughout the dough.
For the fat and sugars, use:
- 200 g unsalted butter, softened to room temperature
- 225 g dark brown sugar, firmly packed
- 50 g granulated sugar
The butter should be softened but never melted. Softened butter helps create the correct dough structure, while melted butter can change how the cookies spread.
Dark brown sugar provides moisture, chewiness, and deeper caramel-like flavor. The granulated sugar contributes sweetness and helps support the crisp, crackly exterior that develops during baking.
For the remaining wet ingredients, use:
- 1 large egg, approximately 50 g without shell
- 15 g molasses
- 5 g pure vanilla extract
The egg helps bind the dough and contributes moisture to the center of the cookies. Molasses reinforces the deeper flavor of the dark brown sugar without making the cookies strongly molasses-flavored.
Vanilla rounds out the chocolate flavor and helps balance the richness of the cocoa.
For the sugar coating, use:
- 100 g granulated sugar for rolling the shaped dough balls
This sugar is separate from the sugar used in the dough. Rolling the dough portions in sugar creates the visible sugar crust and crackly surface that develops during baking.
The complete dough formula contains 10 ingredients, with each ingredient contributing to the final structure, flavor, moisture, or texture of the cookies.
How to Make Chocolate Sugar Cookies
Start by preheating the oven to 350°F (177°C) with the rack positioned in the center. Line 2 large baking sheets with parchment paper.
In a medium bowl, combine 250 g all-purpose flour, 45 g unsweetened cocoa powder, 5 g baking soda, and 3 g fine sea salt. Whisk the dry ingredients together for 30–40 seconds so the cocoa, baking soda, and salt are evenly distributed throughout the flour.
In a stand mixer fitted with the paddle attachment, or using a hand mixer, add 200 g softened butter, 225 g dark brown sugar, and 50 g granulated sugar.
Beat the mixture on medium speed for 2–3 minutes until it becomes lighter, fluffy, smooth, and evenly combined. Scrape down the sides of the bowl as needed to ensure the butter and sugars are fully mixed.
Add 1 large egg, 5 g vanilla extract, and 15 g molasses. Mix for 45–75 seconds until the egg is completely incorporated and the mixture looks smooth.
Scrape down the bowl again before adding the dry ingredients.
Reduce the mixer speed to low and add the flour and cocoa mixture in 2–3 additions. Mix only until the flour disappears.
The finished dough should be thick, soft, scoopable, and slightly sticky. Avoid overmixing because excessive mixing can develop more gluten and work against the tender, chewy texture this recipe is designed to create.
Divide the dough into 16 equal portions of 53 g each. A kitchen scale provides the most consistent results.
Gently round each portion into a ball without compressing the dough too much. Roll each dough ball generously in the prepared 100 g granulated sugar, making sure the outside is evenly coated.
Arrange the sugar-coated dough balls on the parchment-lined baking sheets, leaving approximately 2½–3 inches between them. About 6 cookies per large baking sheet is a practical arrangement, so the 16 cookies can be baked in three batches of 6, 6, and 4 as needed.
Do not chill the sugar-coated dough balls before baking. The no-chill method is an important part of the recipe because it allows the dough to respond quickly in the oven and develop the intended rise-and-fall behavior and crackly sugar surface.
Bake for 11–12 minutes, checking the first batch around the 11-minute mark.
The cookies are ready when the edges are set, the surface is visibly cracked, the sugar crust looks dry, and the center remains slightly soft. Do not wait for the entire cookie to become firm in the oven because the residual heat from the baking sheet will continue setting the centers after removal.
Remove the cookies from the oven and allow them to cool on the baking sheet for 10 minutes.
Transfer them to a wire rack and let them cool completely for another 20–30 minutes. The cookies may deflate slightly during cooling, which is consistent with the intended rise-and-fall texture.
Once completely cooled, store the cookies in an airtight container at room temperature for approximately 4–7 days, away from direct sunlight and excessive heat.
Variations
These chocolate sugar cookies can be finished in different ways depending on the occasion and the decorating style you prefer.
- Buttercream Frosting: Spread a classic vanilla buttercream over the cooled cookies and add sprinkles or gel food coloring for a simple decorated finish. This option works well for beginners because it is easy to spread and customize.
- Royal Icing: Use royal icing when you want sharper details or more defined designs. Because it sets firm, it is a good choice for detailed decorating and cookies that need a more structured finish.
- Easy Glaze Icing: Prepare a simple glaze with a bowl and whisk or fork for a softer decorating option. It can be colored with gel food coloring and applied with piping tips or a squeeze bottle.
- Simple Iced Finish: For a quicker option, dip the tops of the cooled cookies into icing instead of creating detailed designs. This gives a finished look with less decorating time.
- Chocolate Finish: Add a light coating of melted dark or white chocolate for extra chocolate flavor while keeping the original cookie texture unchanged.
These finishing options are best treated as decorations rather than changes to the cookie formula. The base recipe should remain the same to preserve the intended chewy center, lightly crisp edges, and crackly sugar crust.
Tips for the Best Cookies
The easiest way to get consistent chocolate sugar cookies is to keep the dough portions even and avoid overworking the dough. Using a digital scale to measure 53 g of dough for each cookie helps create uniform baking results.
A two-tablespoon scoop can also help divide the dough, but weighing the portions gives the most reliable texture from cookie to cookie.
Gently shape each portion into a ball and place them on parchment-lined baking sheets with about 2½–3 inches of space between them. This allows the cookies enough room to spread without touching.
For the deepest chocolate flavor, cocoa powder quality matters. Both natural and Dutch-process cocoa can work, but they may create differences in flavor and color. Whisking or sifting the dry ingredients first helps distribute the cocoa and baking soda evenly throughout the dough.
The dough should remain soft and scoopable rather than stiff. Once the portions are shaped and coated with sugar, do not refrigerate them before baking.
The no-chill method allows the cookies to rise and then settle during baking, helping create the characteristic crackly tops and chewy centers.
Keep a close eye on the baking time because it determines the final texture. Bake at 350°F (177°C) for 11–12 minutes and check around the 11-minute mark.
The edges should be set, the surface should look cracked, and the center should still appear slightly soft. The cookies will continue setting as they cool, which helps prevent a dry or crumbly texture.
The sugar coating is an important finishing detail. Generously coating each dough ball before baking helps create the crisp sugar crust and visible crackled surface.
After baking, allow the cookies to remain on the baking sheet for about 10 minutes before moving them to a cooling rack.
Once cooled, they can be enjoyed plain or decorated with buttercream, vanilla frosting, festive sprinkles, chopped nuts, or a light coating of melted dark or white chocolate.
Notes
For the best texture, allow the cookies to cool completely before storing them. Keep them tightly covered in an airtight container at room temperature, where they should maintain good quality for approximately 4–7 days.
The cookies can also be frozen for up to 3 months. For freezing, wrap the cooled cookies well in plastic wrap and place them in a freezer-safe bag or container.
To defrost, allow the cookies to thaw at room temperature for about 30–60 minutes. If you want to refresh the texture before serving, warm them briefly in a 300°F (149°C) oven, but avoid overheating because excessive heat can affect the soft chewy center.
Plain or decorated cookies can freeze well for up to 3 months. If using icing or buttercream, allow the decoration to set before placing the cookies between sheets of parchment paper in a freezer-safe container.
For this recipe, freezing the baked cookies is the preferred make-ahead method because the intended texture depends on baking the shaped dough balls without a pre-bake chilling step. Preparing and chilling the dough ahead of time may change the final rise, spread, and crackly finish.
A few tools can make preparation easier, including a hand mixer or stand mixer, a silicone baking mat, and a cooling rack. Room-temperature butter is essential, but it should remain cool and pliable rather than overly soft or melted.
If the dough becomes unusually sticky, check the butter temperature before adding extra flour. A room-temperature egg is also helpful because it incorporates more evenly into the butter mixture.
Frequently Asked Questions
Which Cocoa Powder Works Best?
Cocoa powder is the key ingredient responsible for the rich chocolate flavor in these cookies. Both natural and Dutch-process cocoa can be used, although they may create differences in color, flavor intensity, and baking behavior.
For the most predictable results, use the same type and brand of cocoa consistently once you find the flavor profile you prefer.
The larger factor for the final texture is how the dough is handled. This recipe is designed as a chewy drop cookie rather than a cut-out cookie, so the dough does not need to hold a rolled shape.
Once the dough is mixed, portion it, coat the dough balls in sugar, and bake them without chilling. The no-chill process helps preserve the cookie’s quick rise, slight fall, and crackly sugar crust.
Can the Dough Be Made Ahead or Frozen?
For the best result, the cookie dough should be mixed, portioned, sugar-coated, and baked in the same session.
The engineered recipe specifically uses a no-chill workflow, so shaped dough balls should not be refrigerated before baking because chilling can alter the intended rise, spread, and crackly finish.
If you want a make-ahead option, freezing the fully baked cookies is the preferred method. Once completely cooled, wrap the cookies well and freeze them for up to 3 months.
When needed, thaw them at room temperature for approximately 30–60 minutes.
This keeps the make-ahead option useful without changing the recipe’s intended no-chill method.
Pinterest Pins