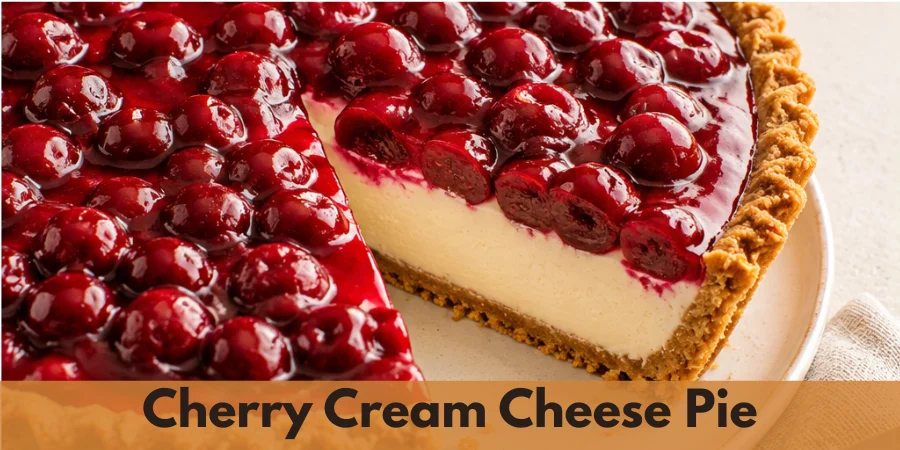
This easy Cream Cheese Cherry Pie is a simple no-bake dessert that works beautifully for family dinners, group gatherings, parties, bake sales, and potlucks. The combination of a prepared graham cracker crust, smooth cream cheese filling, sweetened condensed milk, and cherry pie filling creates a convenient dessert without making it feel ordinary.
This shortcut dessert takes a semi-homemade approach, making it especially useful when you want something that looks special without spending hours in the kitchen. The ready-to-use crust removes the need for a homemade crust, while the no-bake filling keeps the preparation simple and beginner-friendly.
Cherry Cream Cheese Pie-The Short Answer
I especially like this cream cheese cherry pie because the process is straightforward while still delivering the familiar comfort of an old-fashioned pie. The cream cheese creates a smooth, creamy layer with a slight tanginess, while the juicy cherry pie filling adds bright fruit flavor and a beautiful contrast.
The balance between the creamy filling and cherry topping makes this dessert flavorful without requiring complicated techniques. The cream cheese layer helps soften the sweetness of the cherry filling, creating a clear separation between the rich cheesecake-style base and fruity topping.
For the best texture, the filling needs enough time to set before adding the cherry topping. After preparing the cream cheese layer in the graham cracker crust, refrigerate the pie for:
- 2–4 hours
This allows the filling to become firm enough to support the topping and makes the finished pie easier to slice.
The result is a convenient homemade dessert with a polished bakery-style appearance, clean layers, and a creamy texture that works well for both kids and adults.
Why You’ll Love This Recipe
What makes this family favorite special is how easily it creates a beautiful dessert from simple ingredients. A prepared graham cracker crust keeps the process easy, while the creamy filling and cherry topping give the pie a finished look that feels suitable for special occasions.
This recipe is especially practical when you want a reliable no-bake dessert without spending hours in the kitchen. The filling comes together quickly, and the chilling time does the work of creating a firm, sliceable texture.
The combination of cream cheese and cherry filling creates a balanced flavor profile. The cream cheese adds richness and a slight tang, while the cherries bring bright fruit flavor that keeps the dessert from feeling too heavy.
Ingredients Needed
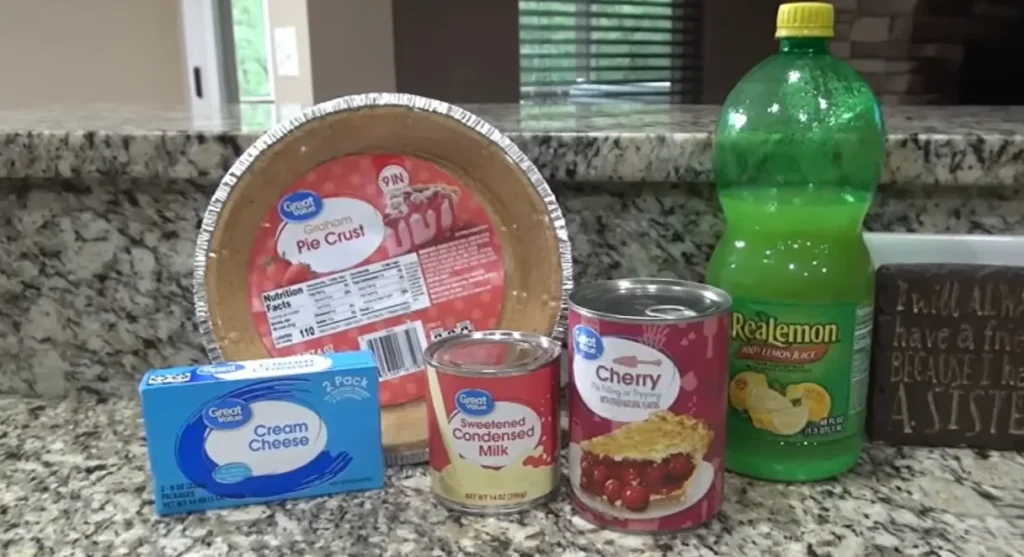
For this cream cheese cherry pie recipe, start with a ready-to-use:
- 9-inch prepared graham cracker crust
Using a prepared crust keeps this dessert simple and beginner-friendly while providing a sturdy base for the creamy filling.
For the cheesecake filling, use:
- 8 ounces cream cheese
softened to room temperature.
Softened cream cheese blends more smoothly and helps create a creamy filling without lumps.
Add:
- 1 (14-ounce) can sweetened condensed milk
- 1/3 cup lemon juice
- 1 teaspoon vanilla extract
The sweetened condensed milk provides sweetness and a smooth texture, while the lemon juice balances the richness and prevents the filling from becoming overly sweet. Vanilla extract adds a warm flavor that complements both the cream cheese and cherry topping.
Finish the pie with:
- 1 (21-ounce) can light cherry pie filling
Add the cherry pie filling only after the cream cheese layer has been refrigerated for:
- 2–4 hours
and is firm enough to support the topping.
Keep the finished pie refrigerated and serve it cold for the best texture and clean slices.
Step By Step Instructions
Making this Cream Cheese Cherry Pie is simple because the prepared crust and no-bake filling remove many of the extra steps required in traditional pies. The most important part is allowing enough chilling time so the cream cheese layer becomes firm and supports the cherry topping properly.
Prepare the Crust
Start with the prepared:
- 9-inch graham cracker crust
Place the crust on a flat surface and keep it ready for the filling.
Since this recipe uses a ready-to-use crust, there is no need to prepare or bake the crust before adding the filling. The crust provides a convenient base while keeping the recipe quick and beginner-friendly.
Make the Cheesecake Filling
The filling comes together in only a few simple steps, but the texture depends on properly softening the cream cheese before mixing.
Place the softened cream cheese in a large mixing bowl. Using an electric hand mixer or stand mixer, beat the cream cheese until it becomes smooth and creamy.
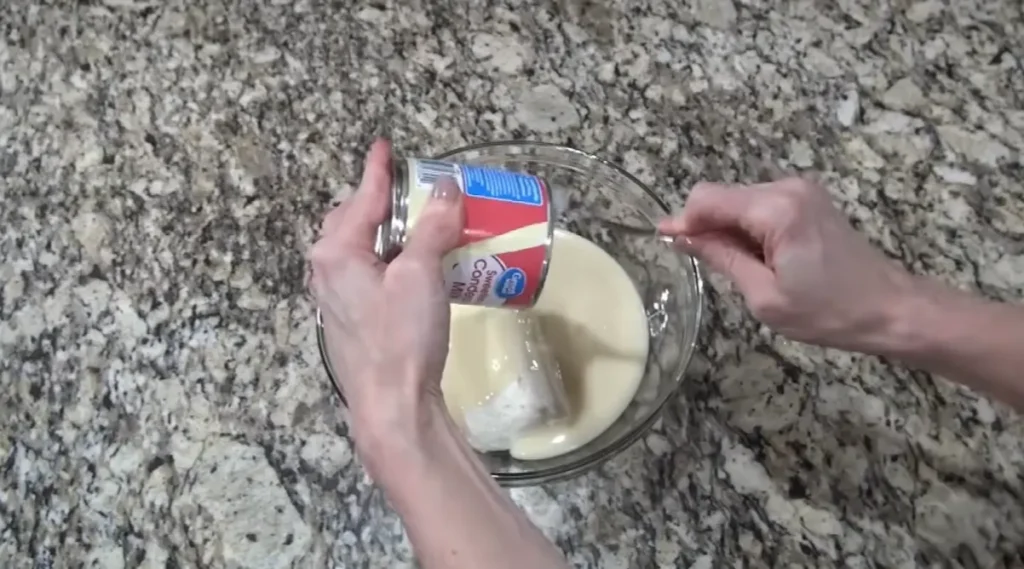
Allowing the cream cheese to reach room temperature before mixing helps prevent lumps and creates a smoother cheesecake-style filling.
Gradually add:
- 1 (14-ounce) can sweetened condensed milk
and continue mixing until the cream cheese and condensed milk are fully combined.
Add:
- 1/3 cup lemon juice
- 1 teaspoon vanilla extract
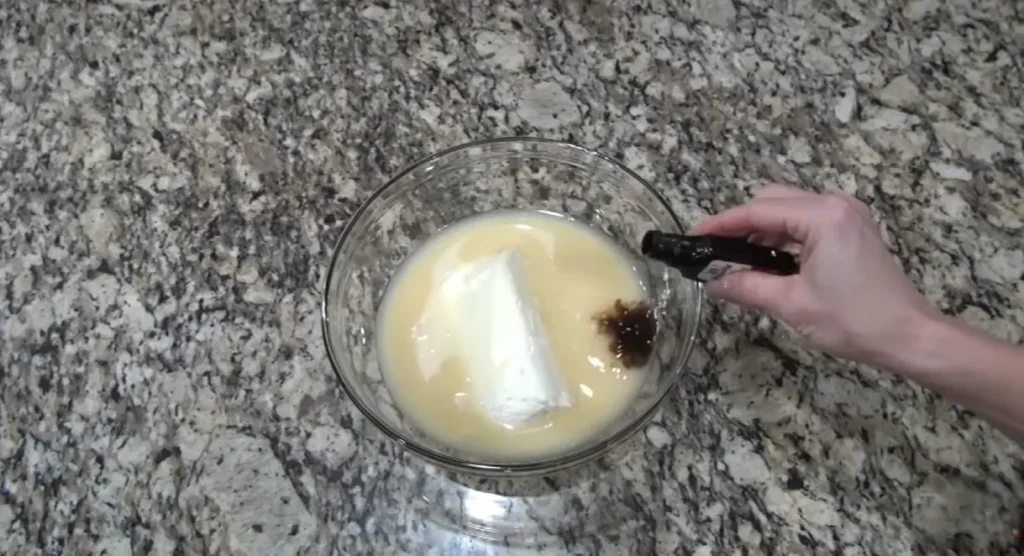
then mix until everything is completely incorporated.
The finished mixture should have a smooth, uniform consistency with enough thickness to spread easily into the crust.
Fill and Chill the Pie
Transfer the cream cheese mixture into the prepared graham cracker crust.
Use a silicone spatula to spread the filling evenly and smooth the top. Creating an even layer helps the pie set properly and makes the finished slices look cleaner.
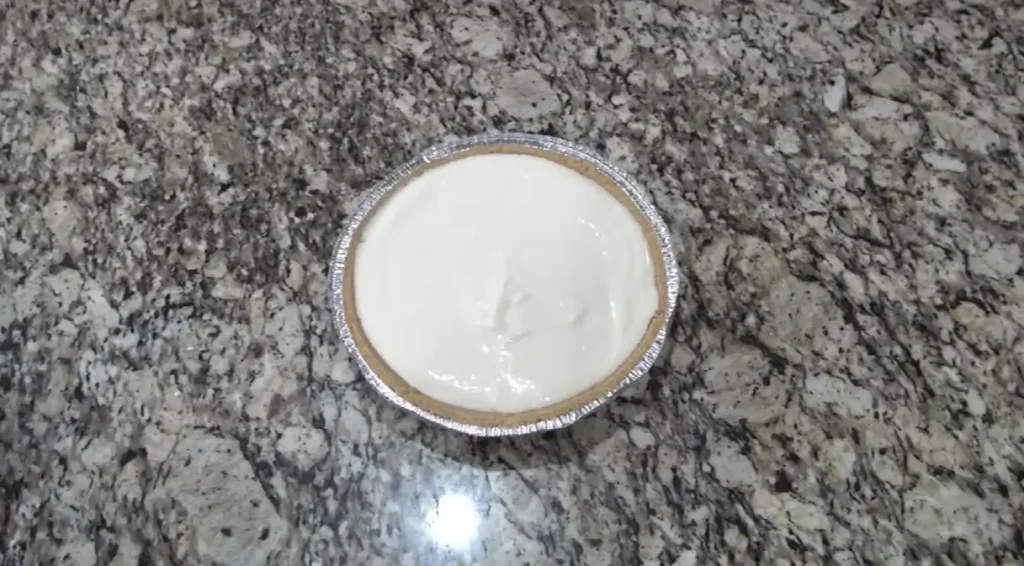
Cover the pie and refrigerate for:
- 2–4 hours
or until the cream cheese filling becomes firm enough to support the cherry topping.
Before adding the cherries, check that the filling no longer appears liquid and can hold its shape.
This first refrigeration step is important because it keeps the cream cheese layer distinct from the cherry topping and creates the clean layered appearance of the finished pie.
Add the Cherry Topping
Once the cream cheese layer has fully set, open:
- 1 (21-ounce) can light cherry pie filling
Spoon the cherry topping evenly over the chilled filling.
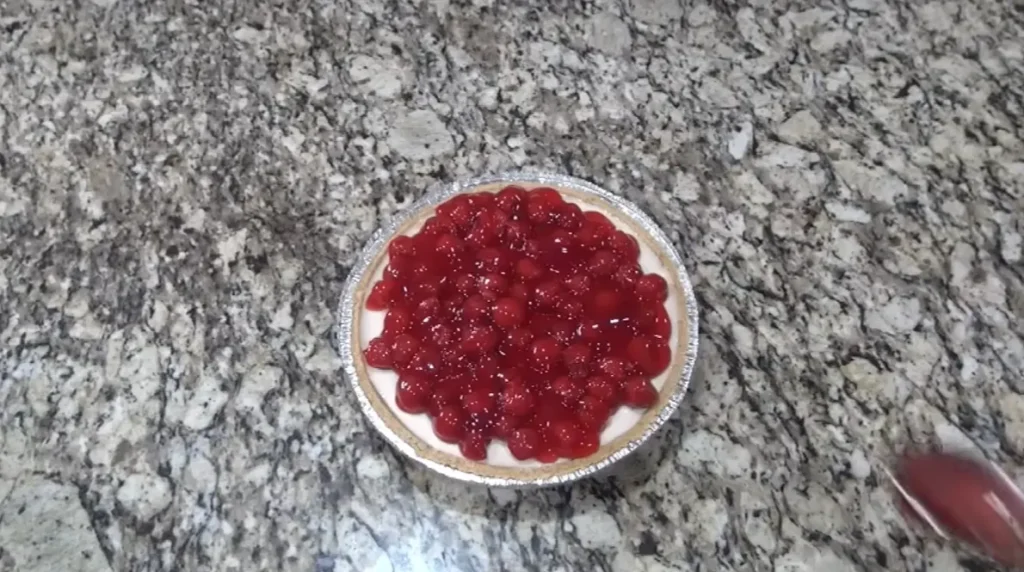
Spread the cherries gently toward the edges without pressing them deeply into the cream cheese layer.
Keeping the topping on the surface helps maintain the clear contrast between the creamy cheesecake layer and the bright cherry topping.
After adding the cherries, keep the pie refrigerated until serving.
Serve the Pie
Keep the finished Cream Cheese Cherry Pie cold in the refrigerator until ready to serve.
For the cleanest slices, serve the pie directly from the fridge while it is chilled and firm.
Cut the pie into:
- 8 slices
and use a serving spatula to transfer each slice.
The pie should remain refrigerated so the filling maintains its structure and each slice keeps a smooth, layered appearance.
Expert Tips for the Best Texture
The most important part of making this Cream Cheese Cherry Pie is creating a smooth filling that sets properly before the cherry topping is added. A few simple techniques help maintain the creamy texture, clean layers, and easy slicing that make this no-bake dessert successful.
Use Fully Softened Cream Cheese
From my experience in the kitchen, softened cream cheese creates the smoothest filling and helps prevent lumps during mixing.
Allow the cream cheese to soften before combining it with the other ingredients so it blends evenly with the sweetened condensed milk.
A smooth cream cheese base creates a consistent filling that spreads easily into the graham cracker crust and gives each slice a creamy texture.
Do Not Rush the Fridge Time
The refrigeration period is an important step because the cream cheese filling needs enough time to become firm before the cherry topping is added.
Wait until the filling has set properly before spreading the cherry pie filling on top. Adding the topping too early can cause the layers to mix together and prevent the pie from developing its clean, distinct appearance.
After the filling has chilled and become firm, gently add the cherry topping and continue keeping the pie refrigerated until serving.
Add the Cherry Topping Gently
When adding the cherry pie filling, spread it carefully across the surface without pressing the cherries deeply into the cream cheese layer.
This helps maintain the visual contrast between the creamy cheesecake-style filling and the bright fruit topping.
A gentle approach also helps keep the layers separate, making the finished pie easier to slice and more appealing when served.
Keep the Pie Chilled
Cream Cheese Cherry Pie has the best texture when served cold.
Keeping the pie refrigerated helps the filling remain firm enough to slice cleanly while maintaining the smooth consistency of the cream cheese layer.
For the best presentation, keep the pie covered and chilled until ready to serve.
Variations To Try
The easiest way to customize this Cream Cheese Cherry Pie is by changing the fruit topping while keeping the same creamy cheesecake-style base.
Although cherry is the classic choice, other pie fillings can create a different flavor experience. Options such as strawberry, blackberry, and mixed berry fillings work well when you want to change the fruit flavor while keeping the same no-bake structure.
You can also choose strawberry pie filling, mixed berry pie filling, or blackberry pie filling depending on your preference.
For a fun serving idea, leave the filling off the cream cheese pie and offer different fruit toppings separately. This allows each person to customize their own slice with their favorite flavor.
Optional Whipped Cream Topping
For an additional creamy finishing touch, prepare homemade whipped cream using:
- 3/4 cup heavy whipping cream
- 1–2 tablespoons powdered sugar
Beat the heavy whipping cream until stiff peaks form, then use it as an optional topping for individual servings.
This adds extra creaminess while keeping the cherry filling as the main fruit variation without changing the core pie recipe.
Notes
For the best Cream Cheese Cherry Pie texture, keep the pie refrigerated rather than freezing it. Proper chilling helps the cream cheese filling stay firm while maintaining the smooth, creamy consistency that makes this no-bake dessert enjoyable.
For leftovers, store the pie covered in the refrigerator for up to:
- 5 days
Keeping the pie covered helps protect the filling and topping while preventing it from absorbing other refrigerator odors. The plastic cover that comes with the prepared crust can be useful for storage if it fits securely.
I find that the leftovers can become even more enjoyable when properly chilled because the flavors continue to blend. However, keep in mind that the graham cracker crust may gradually become softer as the pie sits for a longer period.
Make-Ahead Instructions
This recipe works well as a make-ahead dessert because the cream cheese filling needs time to set before serving.
Prepare the filling and allow enough refrigeration time for it to firm properly. The filling needs at least:
- 2 hours
in the refrigerator and can remain chilled for up to:
- 4 hours
if needed before adding the cherry pie filling.
For serving preparation, make the filling in the morning, refrigerate it for:
- 2–4 hours
until set, then add the cherry topping.
You can also prepare the complete pie:
- 1 day ahead
by covering it and refrigerating overnight. This makes it ready to serve the following day without last-minute preparation.
Optional Whipped Cream Serving Enhancement
For an additional topping option, homemade whipped cream can be prepared using:
- 3/4 cup heavy whipping cream
- 2 tablespoons powdered sugar
Beat the ingredients until stiff peaks form, then use the whipped cream as an optional serving enhancement.
This topping is not part of the core filling but adds an extra creamy finish when serving individual slices.
Nutritional Information
Approximate per:
- 1 slice (1/8 pie)
Values may vary depending on the brands of graham cracker crust, cream cheese, sweetened condensed milk, and cherry pie filling used.
- Calories: 355 kcal
- Carbohydrates: 56 g
- Protein: 7 g
- Total Fat: 13 g
- Saturated Fat: 7 g
- Fiber: 1 g
- Sugar: 43 g
- Sodium: 300 mg
- Cholesterol: 35 mg
These values are approximate and should be considered a general estimate because ingredient brands and product variations can slightly change the final nutrition profile.